
Hiking Oak Mountain State Park: Blue Trail Guide (North Trailhead)
Oak Mountain from the North Trailhead—my go-to routes and what I pack
Words by Michele Underwood | Photos by Michele
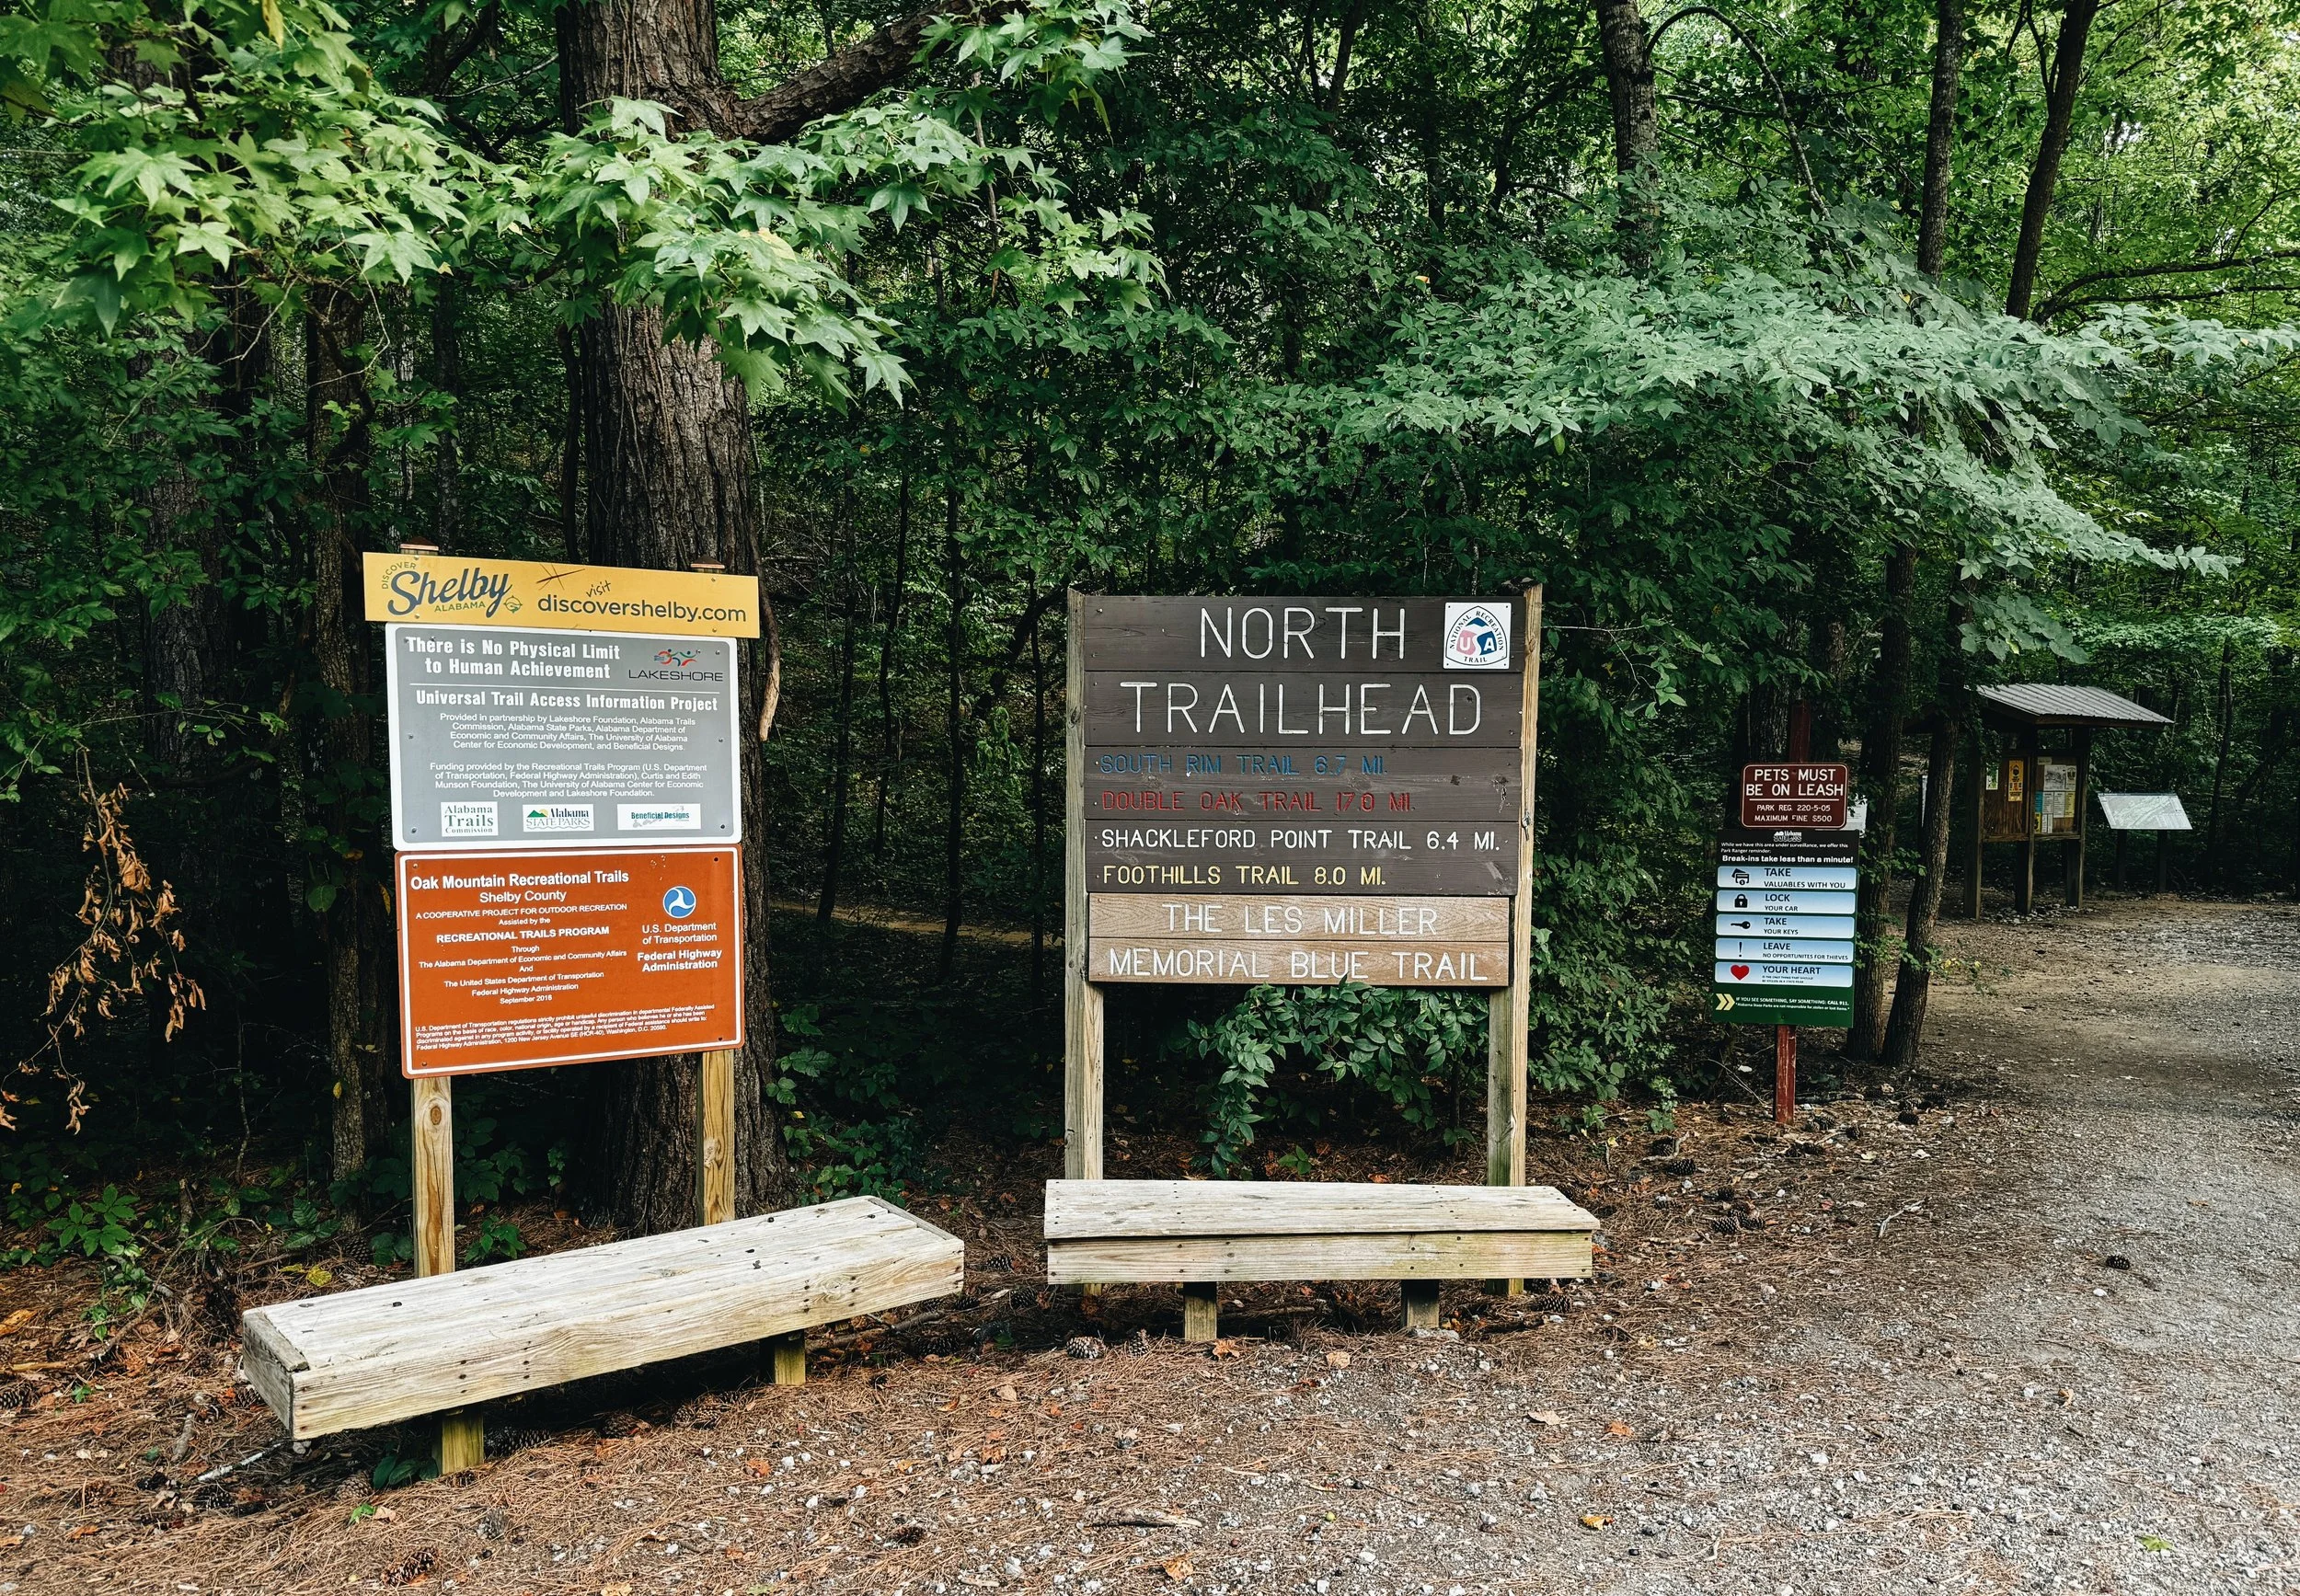
North Trailhead at Oak Mountain State Park — the start of the Blue/South Rim loop, with signs, benches, and the map kiosk.
Hiking is new for me. I’m not saying I’ve never hiked, but getting out 3+ times a week? That didn’t happen until now. Back in June I broke my collarbone mountain biking. Riding has always been my first choice when I’ve got time outside. As soon as I was cleared to move my arm, hiking became the thing that took that nagging pain away.
I already knew Oak Mountain State Park from the bike. It’s one of my favorite places to ride. Now it’s one of my favorite places to hike. I had no idea the park had such amazing, challenging trails—and yes, my legs burn. In this article, I’m sharing the Oak Mountain routes I keep repeating: beautiful, tough, and occasionally just box step-ups on roots and rocks.
I already knew Oak Mountain State Park in Pelham, Alabama from the bike. It’s one of my favorite places to ride. Now it’s one of my favorite places to hike. I had no idea the park had such amazing, challenging trails—and yes, my legs burn. In this article, I’m sharing the Oak Mountain routes I keep repeating: beautiful, tough, and occasionally just box step-ups on roots and rocks. I start at the North Trailhead (bathroom + changing stall; no water). In this article, I’m sharing the routes I keep coming back to and the gear I wear and use.
Where I start: North Trailhead
The North Trailhead at Oak Mountain State Park has a bunch of trails starting right here—hiking and mountain biking—but mostly the hiking routes kick off from this spot. Right across the street from the trail entrance, there’s a parking lot with a bathroom and a changing stall. No water, though.
Pro tip: If you don’t have a yearly pass for Oak Mountain State Park, the entry fee is currently $5 per person (paid at the gate).
Oak Mountain State Park: Favorite Routes from the North Trailhead
I have a few routes I like to do depending on my energy level and how chill I want that day’s hike to be. There are also a lot of connectors between these trails that give you options to either go harder or connect with chiller trails back to the trailhead and parking lot. Here are my favorite routes
Trail Route 1: Blue (South Rim) to King’s Chair + Red Road cool-down
This is my go-to from the North Trailhead: take Blue out to King’s Chair for the view, then hop the connector to Red Road for a chill walk back to the Jeep. Blue is rocky and rooty with short climbs; Red Road lets your legs relax on the return.
Quick Facts
Start: North Trailhead, Oak Mountain State Park (bathroom + changing stall; no water)
Route: Blue Trail to King’s Chair spur → return via Red Road
Distance: ~4–5 mi round-trip • Time: 1.5–2.5 hrs
Elevation: ~600–800 ft gain (rolling)
Surface: rocky/rooty singletrack (Blue); smoother doubletrack (Red Road)
Effort: Moderate—short, steep pops that light up the calves
Fees: Park entry currently $5 per person
Signal/Maps: Cell can be spotty; download offline maps (Trailforks+)
Dogs: Allowed on leash
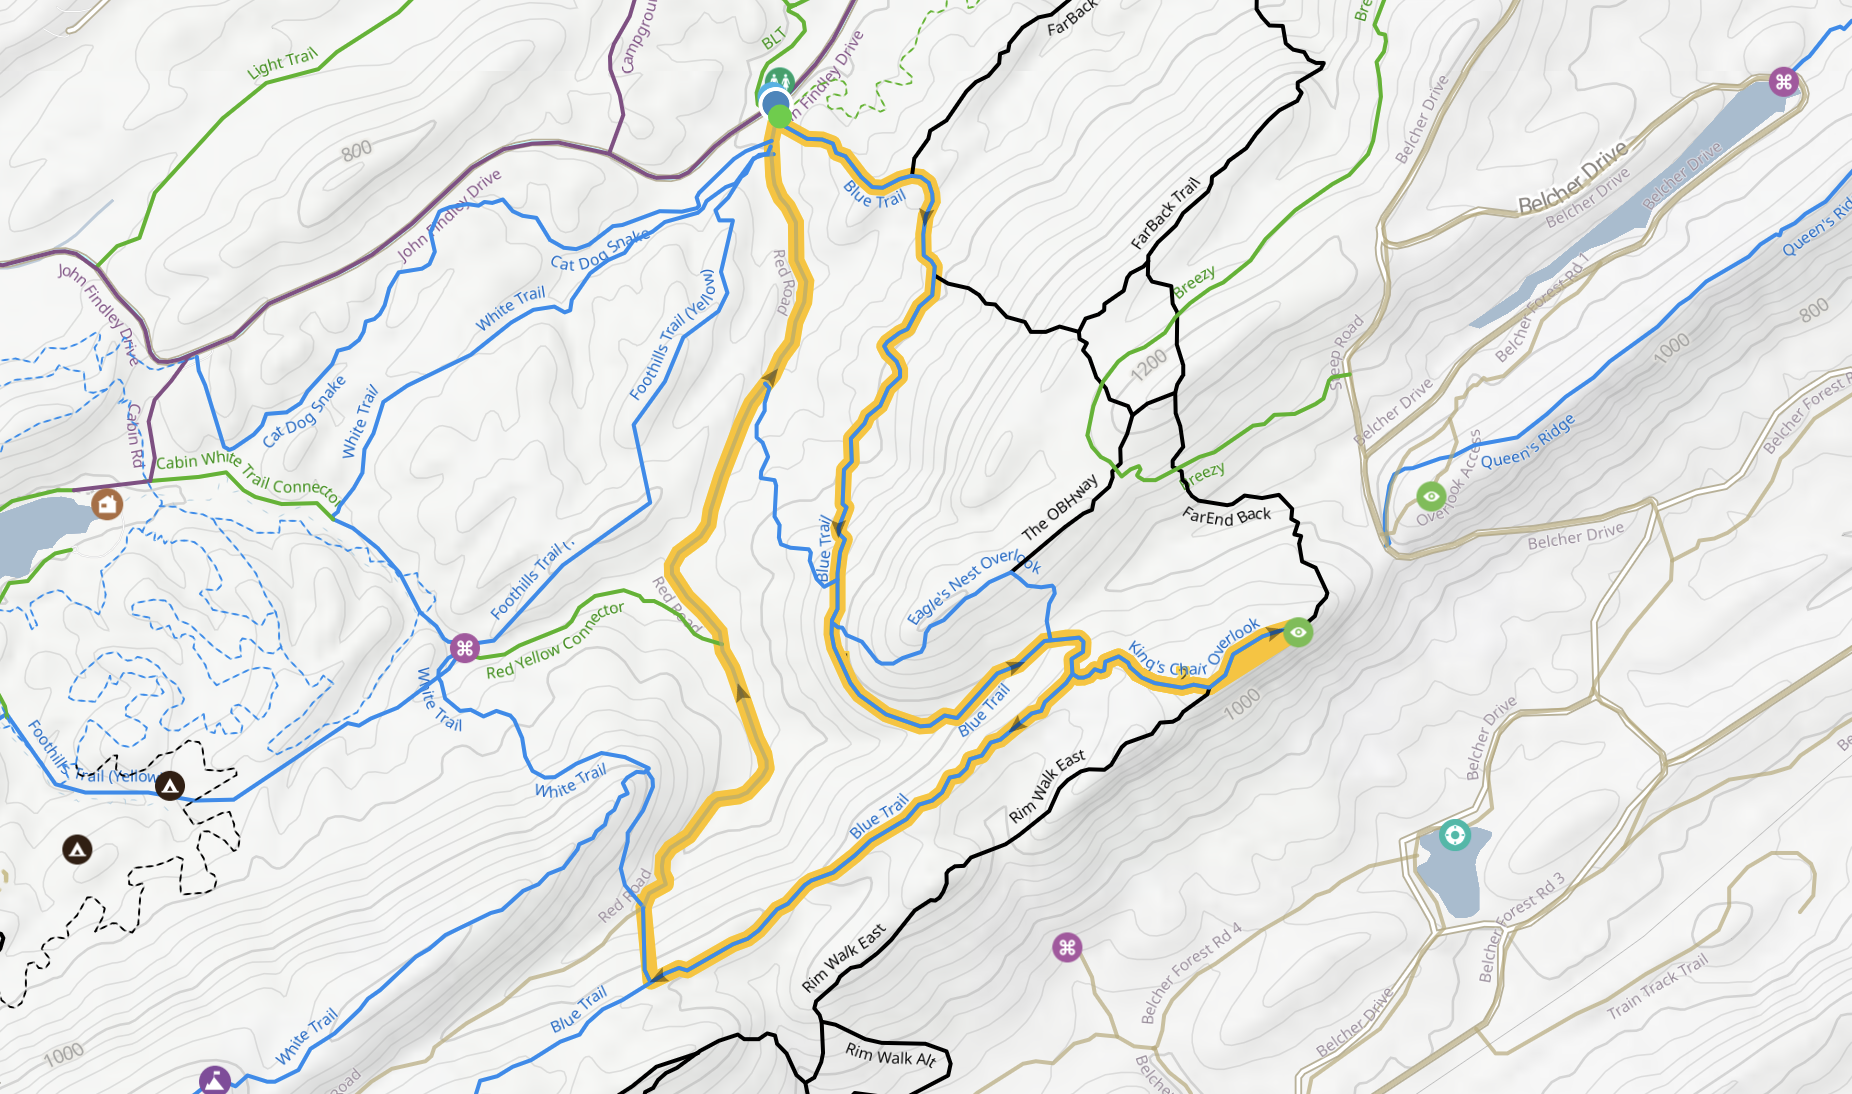
North Trailhead to King’s Chair at Oak Mountain State Park — Blue (South Rim) out-and-back with a Red Road return (route in yellow).
Turn-by-turn
From North Trailhead, head southeast on the Blue Trail (South Rim).
Take the signed left for King’s Chair Overlook.
Follow the rocky spur to the ledge—snack, photo, watch your footing.
Backtrack to the junction, go left to rejoin Blue.
Take the signed connector to Red Road.
Turn left/north on Red Road and follow it west/northwest back to the North Trailhead lot.
Pro Tip: Shade most of the way. Watch for loose rock on short steeps.
King’s Chair Overlook — Oak Mountain State Park (North Trailhead Route)
Pro Tip: Use Trailforks
Trailforks is my go-to at Oak Mountain State Park. The free app is great, but Trailforks+ lets you download the whole area for offline use, so it still works when the park’s cell signal drops (which happens a lot in state parks). Your phone’s GPS works without service, and with offline maps you’ll still see your blue dot on the trail.
On a recent hike, a group asked if they were headed the right way to King’s Chair. I pulled up Trailforks and showed them the turn. They were like, “Wait—you have an app for this?” Yep. And it saves the day a lot.
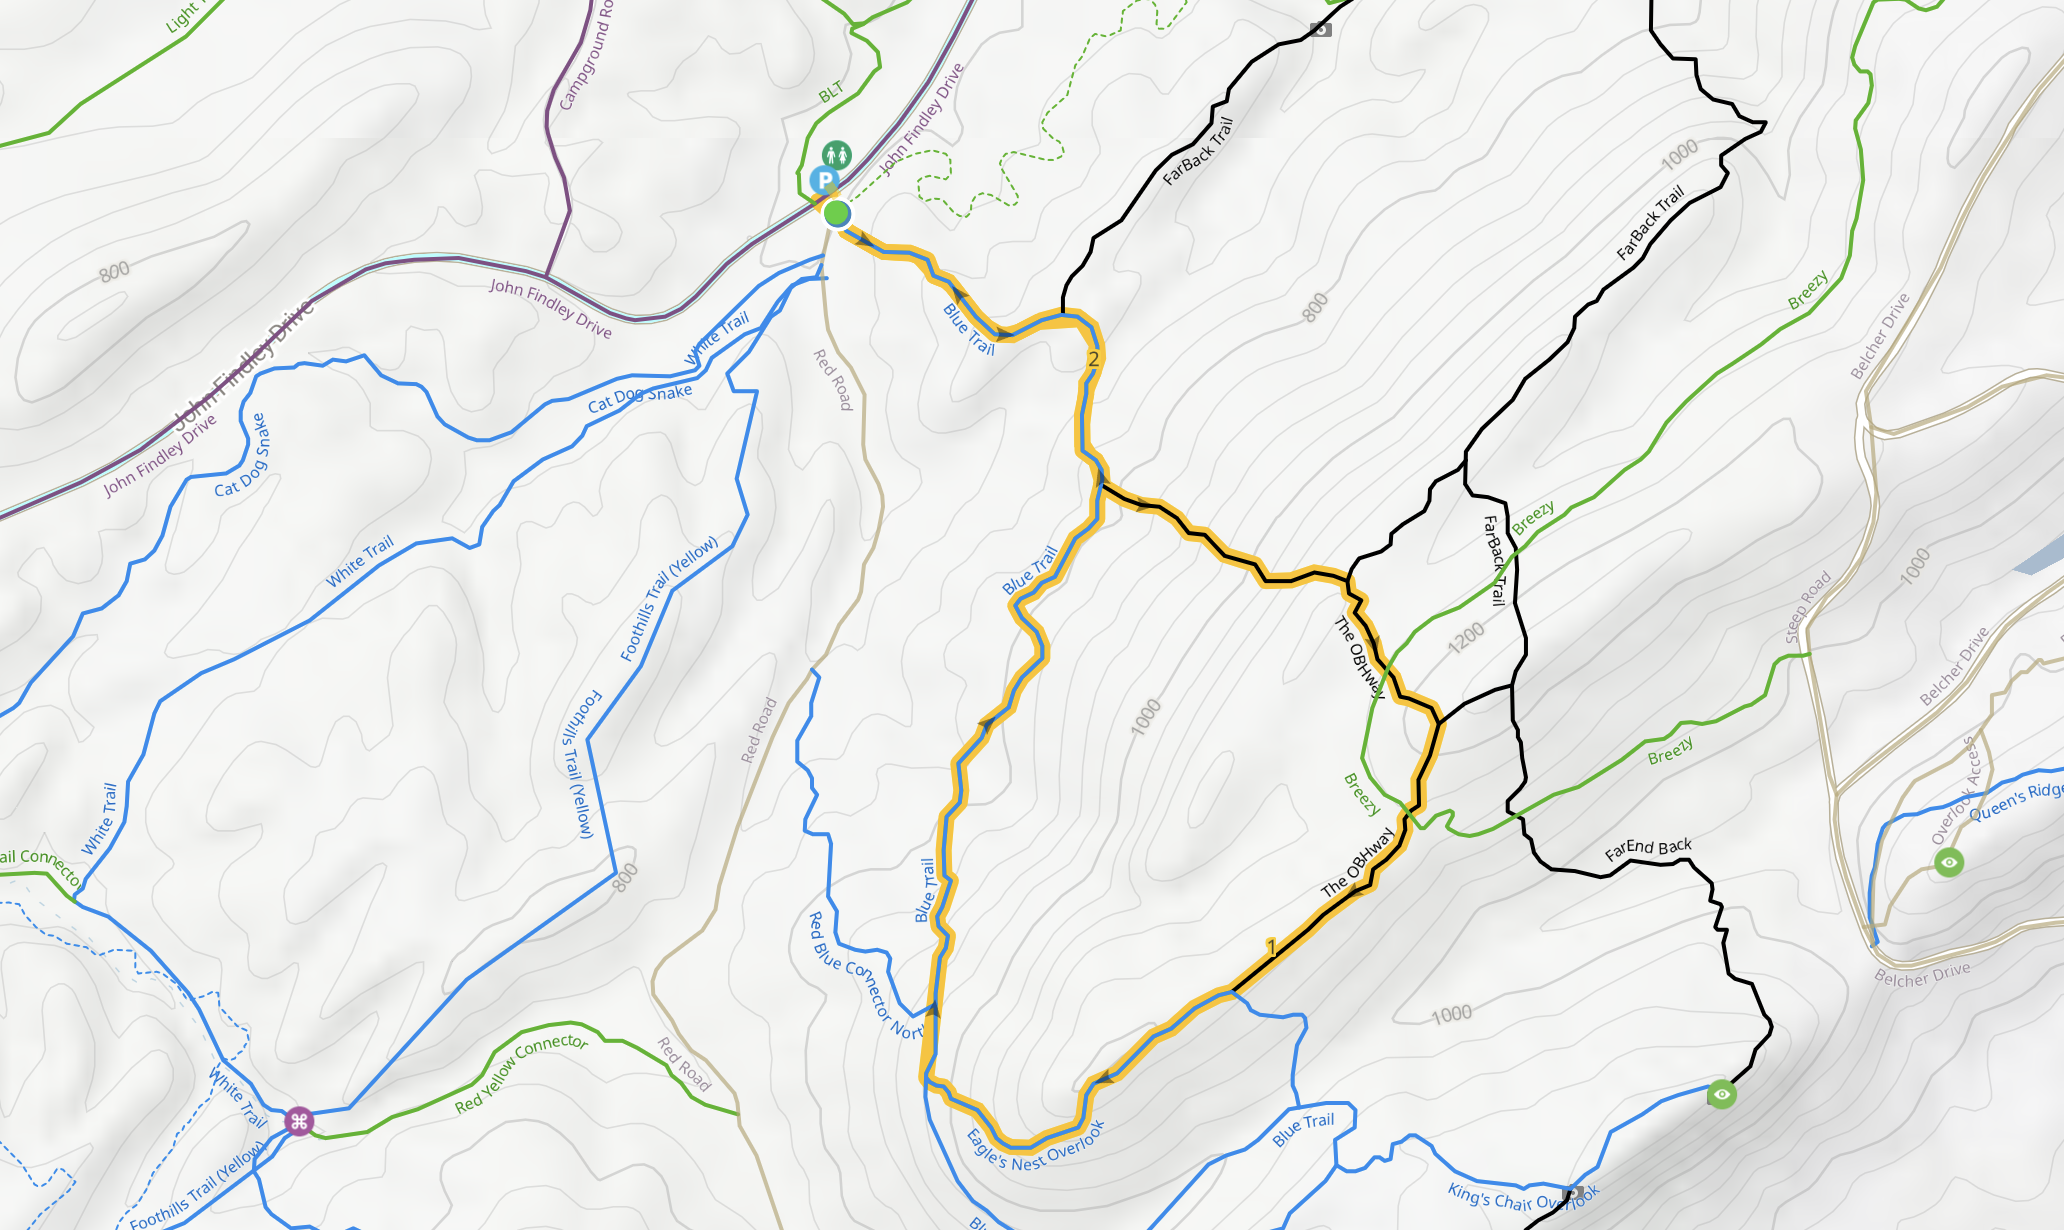
Trail Route 2: Blue (South Rim) to Eagle’s Nest back to Blue
If you want a little extra work without anything sketchy, take the left spur to Eagle’s Nest when you hit the fork. It’s a short, steeper push with rock steps and roots, but it’s not technical—just steady. The spur tops out on a big rock slab (the “Eagle’s Nest”), not a cliff overlook. Stand on the slab, take in the trees, then backtrack to the fork and continue on Blue to cruise the ridge toward the North Trailhead.
Quick Facts
Start/Finish: North Trailhead, Oak Mountain State Park
Route: Blue (South Rim) → Eagle’s Nest Overlook spur → back to Blue → North Trailhead
Distance: ~3.5–4.2 miles round-trip (depends how far you explore past the overlook)
Time: 1.5–2 hours at a steady pace
Elevation: ~500–700 ft gain, punchy ups/downs along the rim
Surface: Rocky/rooty singletrack with a few slabby sections near the overlook
Effort: Moderate; a couple short, steeper pulls
Turn-by-turn (simple):

Map of Route 2 from the North Trailhead—Blue Trail down to Eagle’s Nest and loop back on Blue at Oak Mountain State Park.
From North Trailhead, hop on Blue Trail (South Rim) heading southeast.
Stay on Blue as it rolls along the slope—watch for the signed spur to Eagle’s Nest Overlook.
Left onto Eagle’s Nest Overlook. Walk out to the rock ledge; soak in the view.
Backtrack to Blue, turn left to continue northwest on Blue.
Follow Blue all the way back to the North Trailhead.
Pro tip: Even when dry, some rocks here are brittle or loose. Test each foothold before you commit, favor dirt/roots over isolated slabs, keep your weight low, and consider trekking poles.
Trail Route 3: Blue (South Rim) to The OBHway and back to Blue
This one adds a fun, punchy middle on The OBHway—a black/difficult trail—with a stout initial ascent before you drop back to the Blue Trail. From the North Trailhead at Oak Mountain State Park, you get the usual rocky/rooty Blue singletrack, then a short black-line detour with steeper moves and tighter footing. There’s one spot where you’ll use your hands to pull up a little scramble—quick but legit. It’s spicier than Route 1, not as stair-step heavy as Eagle’s Nest.
Quick facts
Distance: ~3.5–4.5 miles round-trip (depends on where you hop on/off OBHway)
Time: ~1.5–2 hours
Surface: rocky/rooty singletrack; brief scramble on OBHway
Effort: moderate overall; hard initial ascent on OBHway (black/difficult)
Heads-up: some rocks are loose/brittle—test a foothold before you commit
Elevation profile of Route 3 at Oak Mountain State Park showing ~2–2.4 miles with about 642 ft of climb, 674 ft of descent, and a high point near 1,195 ft—rolling climb to the ridge, then a steady descent.
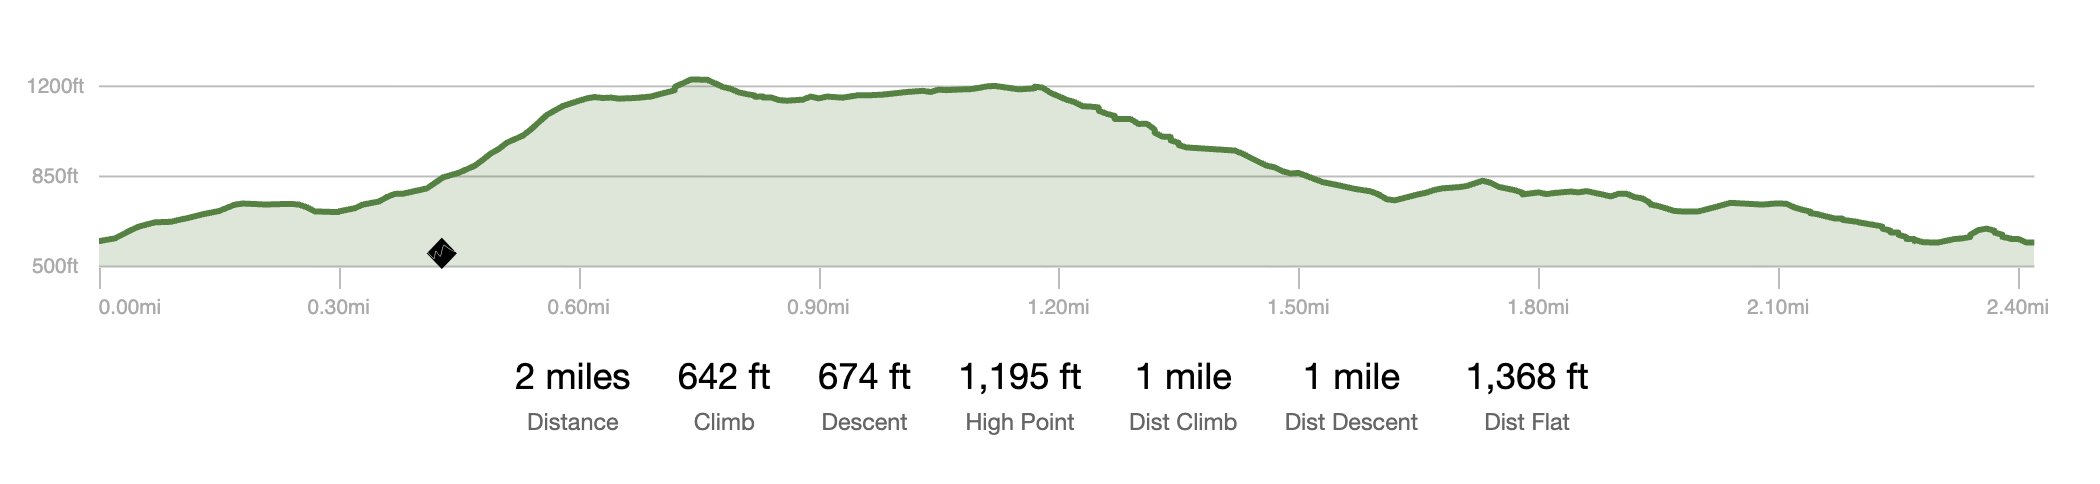
Elevation profile — Route 3 (Blue → The OBHway → Blue), North Trailhead, Oak Mountain State Park.
Turn-by-turn
From North Trailhead, head south on Blue (South Rim).
Stay on Blue to the signed junction for The OBHway; turn left.
Grind the steep opening pitch on OBHway; expect tighter footing and a short hand-over-rock move.
At the next junction, rejoin Blue and turn right to head back north.
Continue on Blue all the way to the North Trailhead.
What I Wear & Bring at Oak Mountain
In my opinion, the type of shoes and water are the most important on a hike. Shoes that grip an don’t slide and water for so many obvious reason. Here is what I bring and why.
01. Hiking shoes: Mammut’s Aenergy Hike Low Women
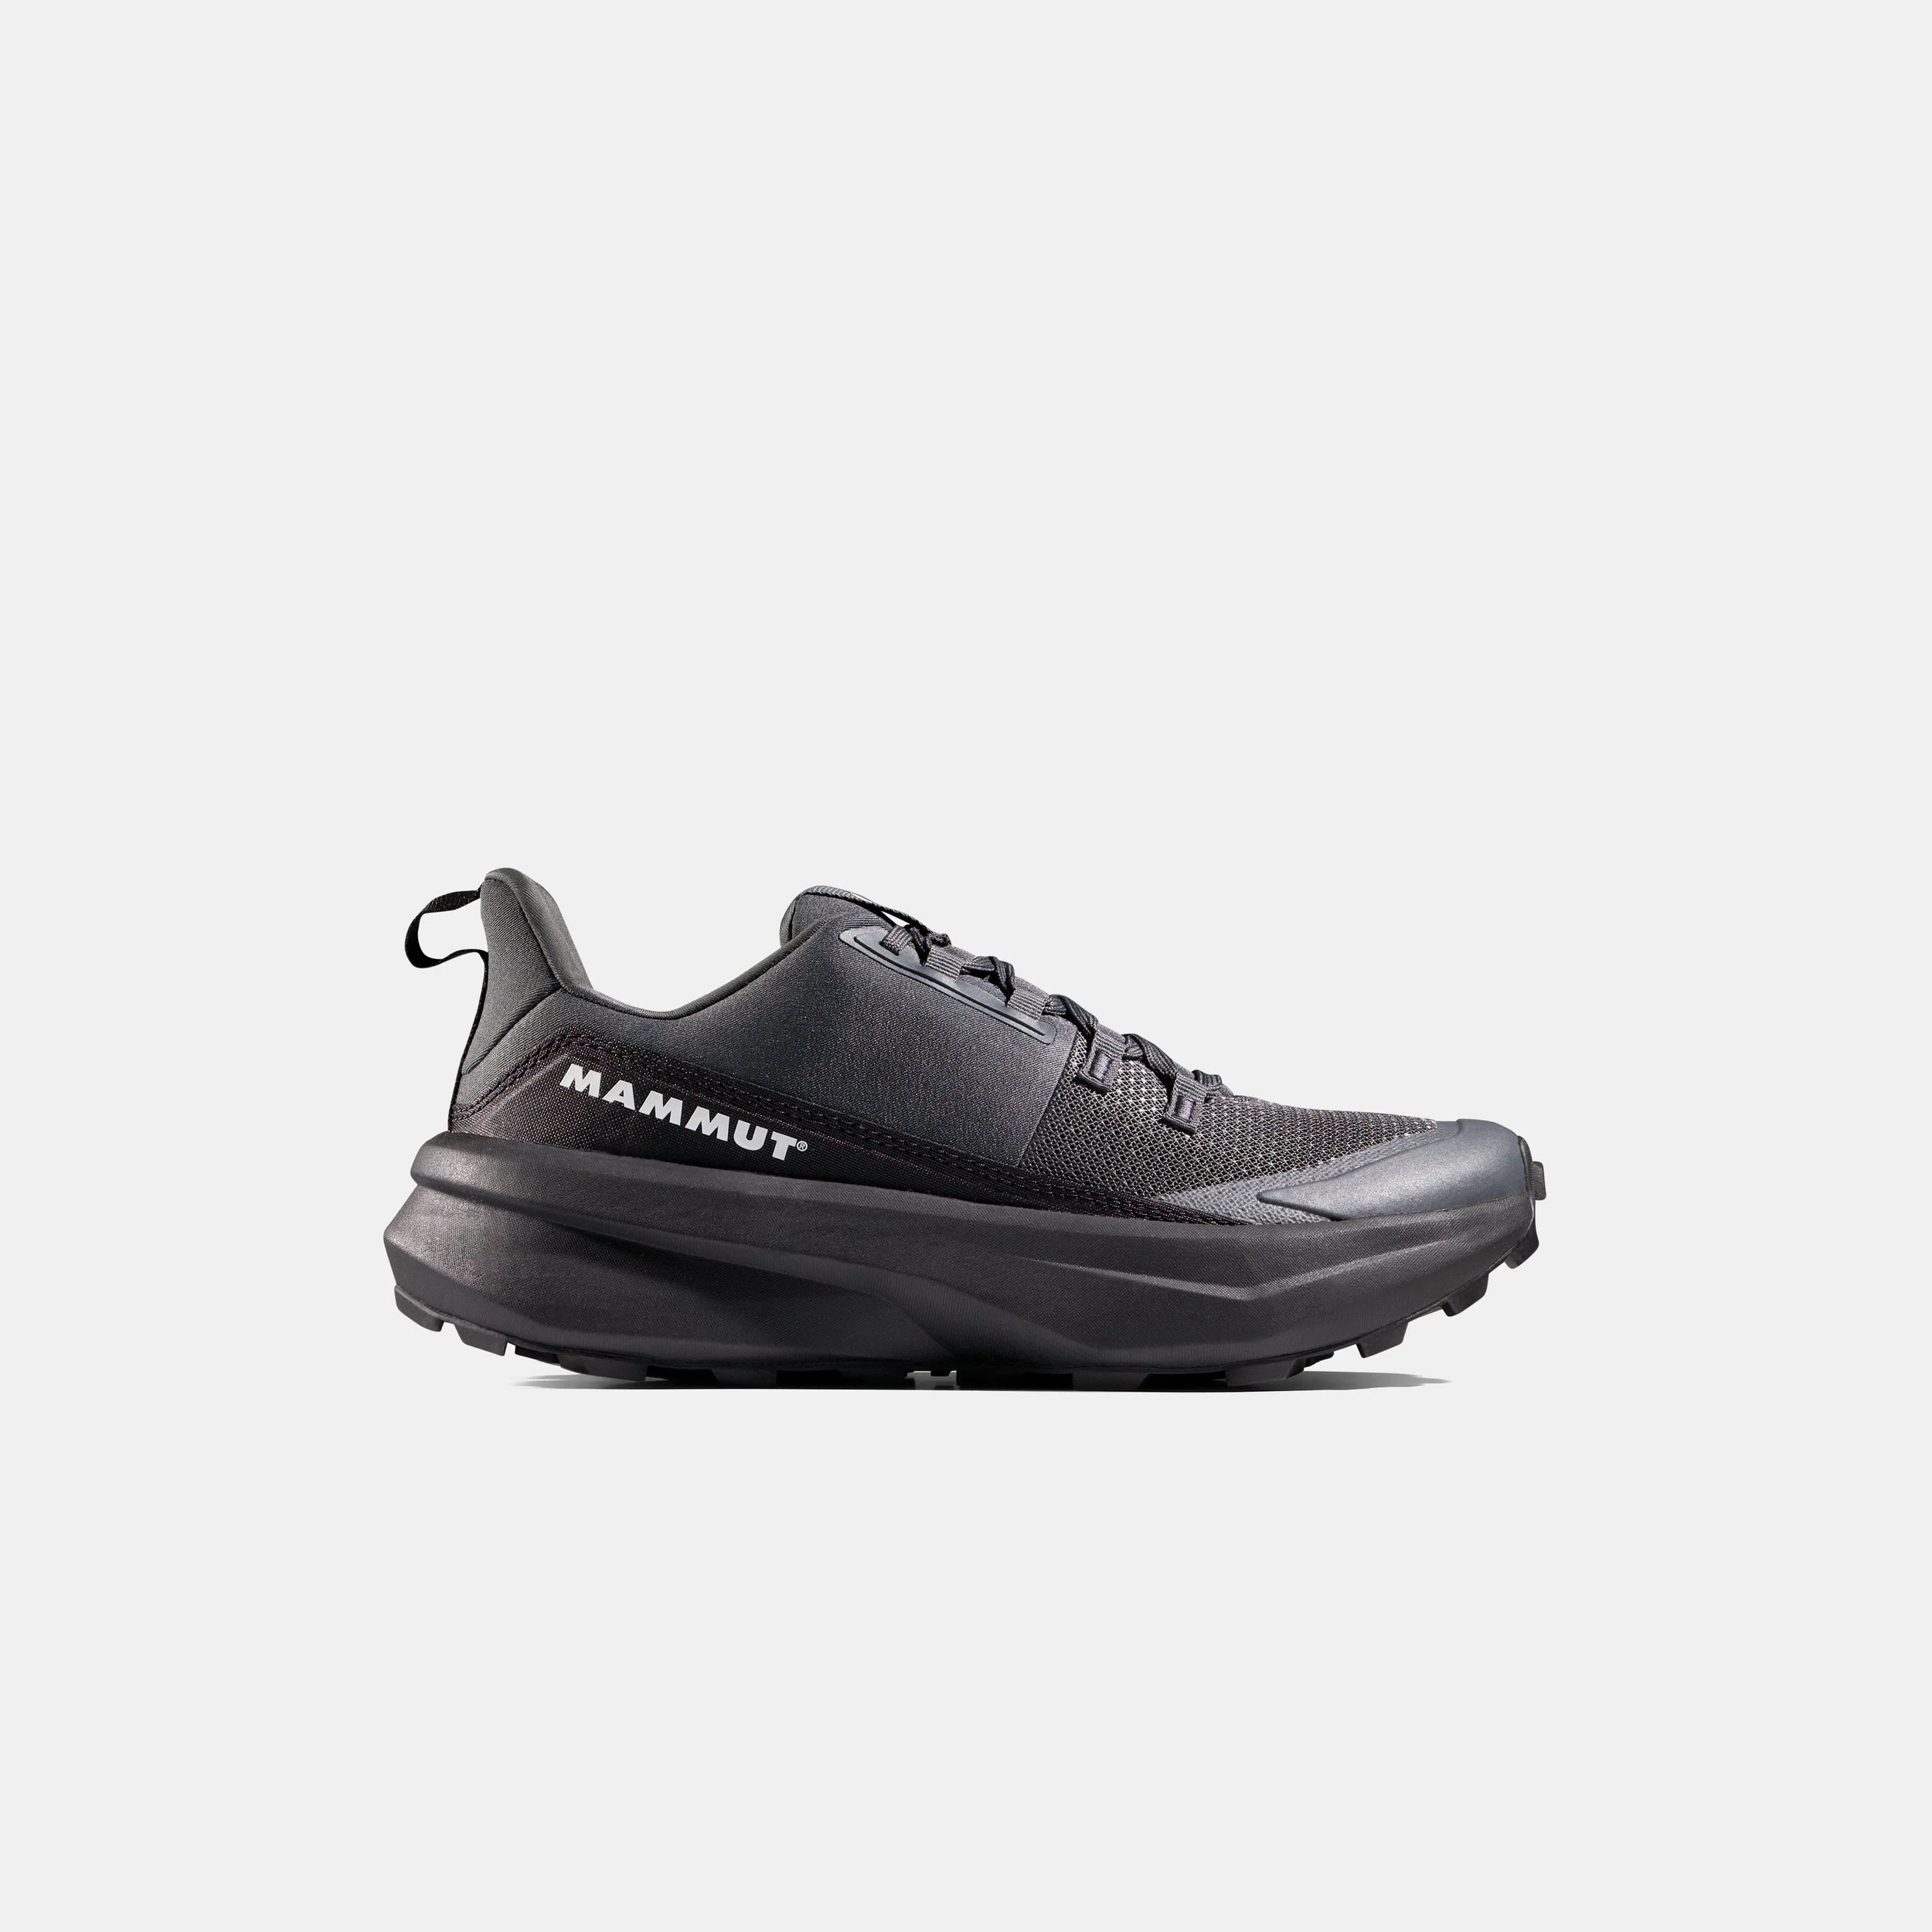
Why I like them: I already love Mammut’s trail runners for the fit, so I tried their new hiking line. The Aenergy Hike Low is super grippy on rocks and roots, comfortable out of the box, and just works.
Want more details? Read my full review: Mammut Aenergy Hike Low Women’s Hiking Shoe.
02. Hydration: LMNT Electrolyte Drink Mix
Why I like it: When participating in any activity that causes you to sweat—especially in hot, humid Alabama—you’ll definitely need water, but salt is important too. I learned all about the importance of salt as part of my nutrition plan when I was an endurance athlete. So water and LMNT are a perfect combo. I recommend Watermelon but a lot of people love the Lemon flavor.
03. Hydration Pack: CamelBak HydroBak Light (1.5L)
Why I like it: Low-profile, comfy, and doesn’t bounce. 1.5L is perfect for my Oak Mountain loops, and the stash pocket holds keys, LMNT, and a snack.
How I use it: I keep plain water in the reservoir and carry LMNT in a small bottle. Some days I go without the reservoir and pack two bottles in the pack.
03. Trailforks (app)
Why I like it: Cell service at Oak Mountain State Park is inconsistent. With Trailforks+, I download the whole park, and my phone’s GPS still shows my blue dot offline—super helpful at junctions like the Eagle’s Nest turn or hopping onto The OBHway.
Read my full review on Trailforks: Gear Review: Trailforks – My Go-To Trail App
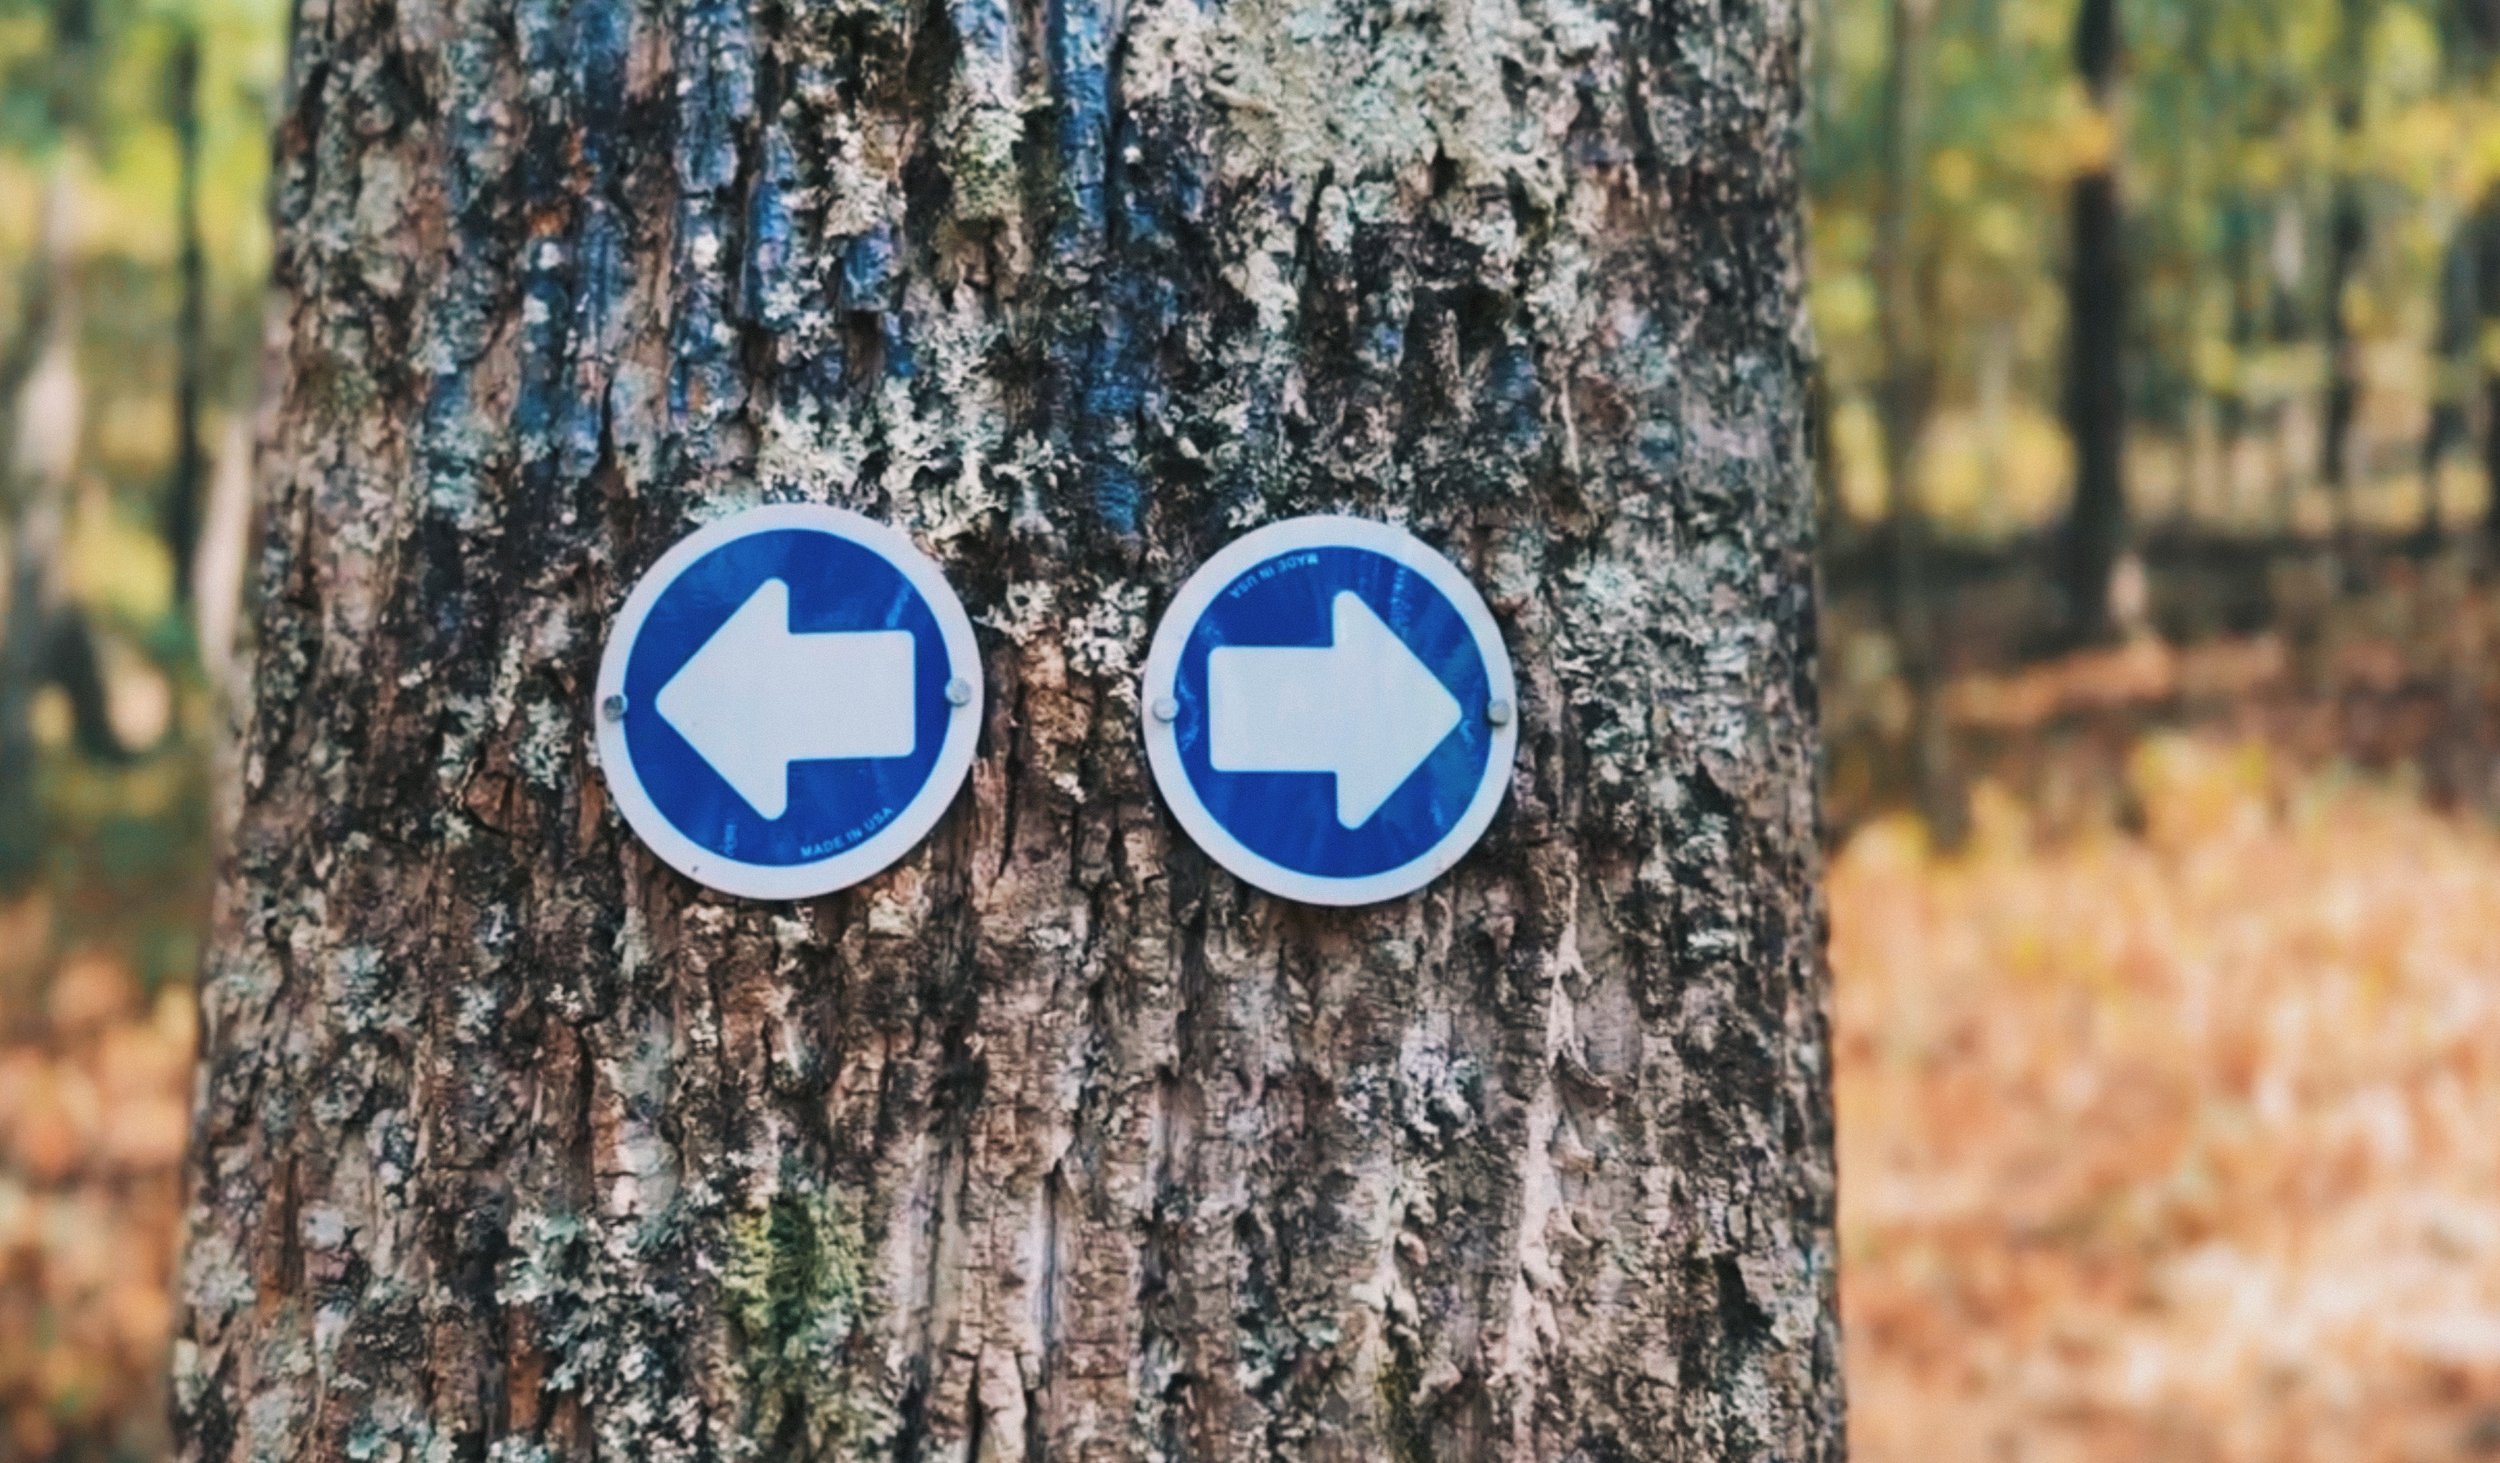
Oak Mountain’s Blue Trail is well-marked—these arrows are everywhere.
Quick Summary: Oak Mountain from the North Trailhead
I hike Oak Mountain State Park a few times a week now, starting at the North Trailhead for rocky/rooty singletrack with a few short, scrambly bits. I mix blue-line routes with the occasional black detour and use Trailforks+ offline, so the map works when cell service is unavailable. My keep-it-simple kit: Mammut Aenergy Hike Low shoes, a CamelBak HydroBak Light (1.5L), and LMNT in my water. Park entry is currently $5 per person; there’s a bathroom at the lot (no water).
Michele Underwood writes Overland Girl, where she shares Shop My Camp Kit—a curated collection of the gear she actually uses on real trips, from the Northwoods of Wisconsin to the Ozarks. She values quality and craftsmanship in everything she buys—from outdoor gear to everyday clothes and furniture. Her choices may seem expensive to some, but she believes in buying less and buying better. Longevity matters, both in terms of function and style. Her couch is five years old and still sold at Design Within Reach—that's the kind of timelessness she looks for. Some of the links in this review are affiliate links, which means she may earn a small commission if you buy through them. It doesn’t cost you anything extra, and it helps support her work. She only recommends gear she’d bring herself.